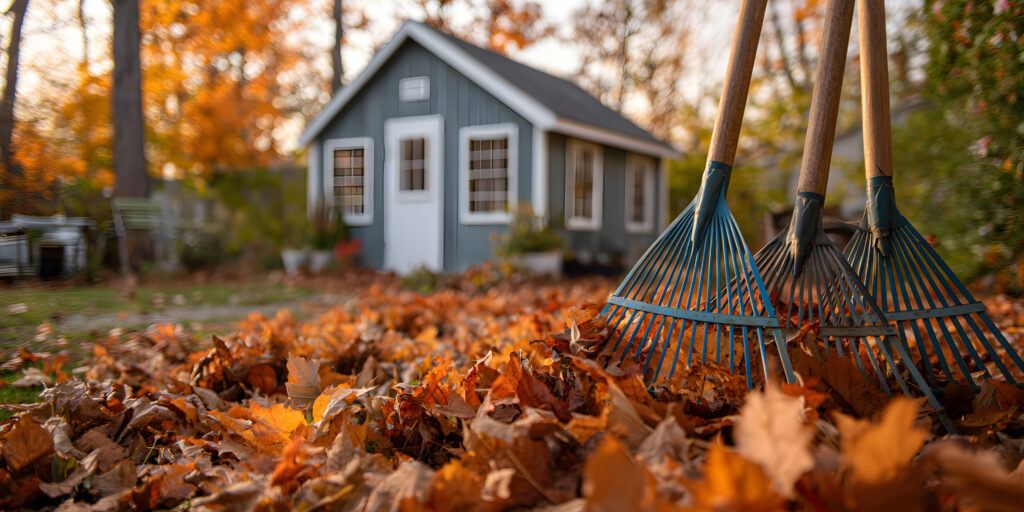
With the arrival of colder weather and the end of the watering season, don’t skip this critical step! Once you’ve finished your autumn gardening tasks, take time to clean and store your tools. Not only does this keep them in excellent condition, but it also makes them easier to locate when spring comes around. A bit of extra effort now guarantees your tools will be ready to help you enjoy a seamless start to the next season.
Where Do I Keep My Garden Tools?
Organize your garden tools by giving them a designated storage area. Clear a space in your garage, garden shed, or basement to prepare for storing supplies. If these aren’t options, a storage closet or an unused cabinet within your home will work too. Having a set location makes sure everything stays neat and ready when it’s needed.
How Should I Prepare My Tools?
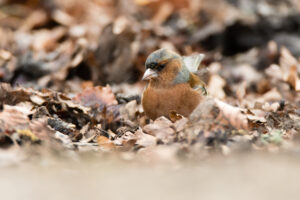
Leaving outdoor gardening tools exposed year-round is a mistake many make, assuming they’re built to last through any weather. However, frost and freezing temperatures can wreak havoc on even the most durable tools. Water trapped in moving parts or electronics will freeze and expand, causing permanent damage. When the temperature drops below 40°F, your equipment is especially vulnerable. With proper care, you can extend the life of your tools, prevent damage from harsh weather, and keep your equipment funcitoning like new for longer.
Garden Hose:
Garden hoses are tricky because they are easily forgotten and can quickly become damaged when left outdoor in poor conditions. They can also be accidentally run over by lawnmowers or mishandled during playtime, leading to creases, cracks, or tears. To ensure your hose lasts, start by disconnecting it from the faucet and draining out all the water. Rinse the exterior to remove dirt, as leftover debris might dry out and cause cracks. Coil the hose neatly and store it on a flat surface, or use a hose reel indoors. Make sure to keep it in a dry location until spring.
Digital Water Timers:
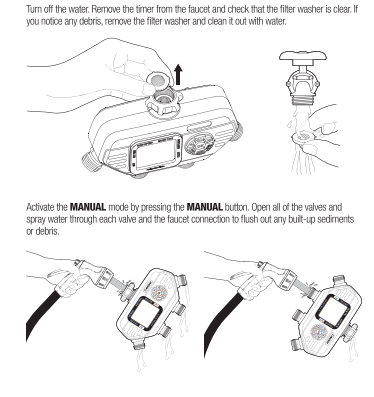
Debris or sediment commonly found in most home water systems can build up inside your timer, leading to mechanical issues. So, remove the timer from the faucet, and activate the ‘Manual’ mode on your Melnor device by pressing the ‘Manual’ button. Then, open each zone and spray water through the valves and faucet connection to flush out any built-up sediments or debris. Also, check that the filter washer is clear. If you notice any dirt, make sure to spray it off with water.
Most digital water timers, like the ones made by Melnor®, use batteries, and when left out in colder temperatures, the batteries will die. At the end of the season or when frost is forecast, remove your timer from the faucet and remove the batteries. Batteries typically last one season, so if you used your timer frequently, it’s smart to scrap the old ones anyway.
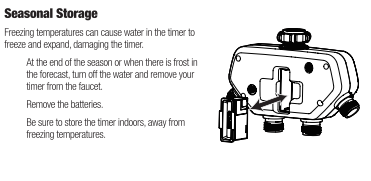
Finally, let your timer air out, then store it indoors, away from freezing temperatures, in a dry place.
Note: How to Reset your Timer
Aggressive transportation of the water timer can cause the valves to open if they were shut in the process of bringing it inside. When the cold weather passes, and you need to reattach it to the faucet, follow the steps below to reset your water timer valves.
Hydrologic Advanced Digital Water Timer
Models 73280, 73100, 73015
- Turn the water off.
- Remove the batteries and wait for the screen to go blank.
- Reinsert the batteries
- Turn the water back on.
- If the problem persists, turn off the water. Use the Manual feature (Step 11 in the instruction manual) to open and close each valve 3 times.
AquaTimer Electronic Water Timer
Models 63280, 63100, 63015
- Press and hold the cursor button for 7 seconds.
- The screen will display ‘Reset.’
- All programming will be lost when the timer displays ‘Reset.’
- Re-enter programming
Sprinklers:
When storing your Melnor® sprinklers, remember that, as with water timers, poor water quality can lead to debris and sediment buildup. This causes the motor to back up and stops the sprinkler from oscillating regularly. Rinse and flush the sprinkler with water periodically to prevent this, not just when bringing it inside for the winter. You can do this by removing the end cap plug, attaching the sprinkler to a hose or faucet, and running water through it. Use the end cap plug, which doubles as a nozzle cleaner, to clean each individual nozzle head. If you use a filter washer with your sprinklers, spray off any built-up sediments on the washer that may cause blockages. Once cleaned, let the sprinkler air out and store it indoors, in a dry location, away from freezing temperatures.
Read our sprinkler cleaning and maintenance guide for more information.
Nozzles and Wands:
Just like sprinklers, water can be left behind inside nozzles and wands. When left outside in colder temperatures, the water can freeze and expand, damaging the casings. This means that the next time you use the nozzle or watering wand, water will shoot out the sides of the handle and flow-control knobs. Prevent this by properly draining your garden nozzles, flushing them out and cleaning off debris, and storing them in a dry place.
Finally, taking a few hours to properly store your garden supplies for the winter can prevent damage or rust. Plus, it also makes it easier to find what you’re looking for come springtime.